Ever been in that familiar moment of mild panic when your trusty Chromebook, usually a beacon of reliability, suddenly decides to throw a digital tantrum? Perhaps it’s a blank screen, a unresponsive trackpad, or maybe it just won’t wake up from its slumber. Before you dive into complex fixes or resign yourself to a day without your device, there's a good chance you can resolve these headaches with one simple, time-honored solution: a restart. This comprehensive guide on Troubleshooting Common Chromebook Issues with a Restart will empower you to tackle frustrating glitches with confidence and get back to what you need to do, fast.
At a Glance: Quick Fixes You'll Learn
- A Restart is Your First Line of Defense: Understand why a simple reboot often clears up most common Chromebook issues.
- Power Problems Solved: Learn what to do if your Chromebook won’t turn on or charge.
- Screen & Input Troubleshooting: Fix blank screens, flickering displays, and unresponsive keyboards/trackpads.
- Connectivity Cures: Get back online and re-establish Bluetooth connections.
- Sound & Speed Boosts: Address audio issues and improve a sluggish Chromebook's performance.
- Beyond the Restart: When to consider a Hard Reset or Powerwash, and how to manage Caps Lock and external keyboards.
Why a Simple Restart Often Works Wonders
Think of your Chromebook as a highly efficient, minimalist machine. It runs the lightweight Chrome OS, which is generally very stable. However, just like any computer, it can accumulate temporary software glitches, memory build-ups, or frozen processes that lead to unexpected behavior. These aren't signs of impending doom; they're usually just digital hiccups.
A restart acts like a system-wide spring cleaning. When you power down and then boot back up, you’re doing several important things:
- Clearing RAM: All temporary data stored in your Chromebook’s active memory (RAM) is erased, giving you a fresh slate.
- Resetting Drivers: Software drivers that manage your hardware components (screen, Wi-Fi, Bluetooth, etc.) are reloaded, often fixing conflicts.
- Closing Frozen Processes: Any misbehaving applications or background processes that are stuck or consuming excessive resources are terminated.
- Re-establishing Connections: Network adapters and other peripherals are reinitialized, which can resolve connection drops.
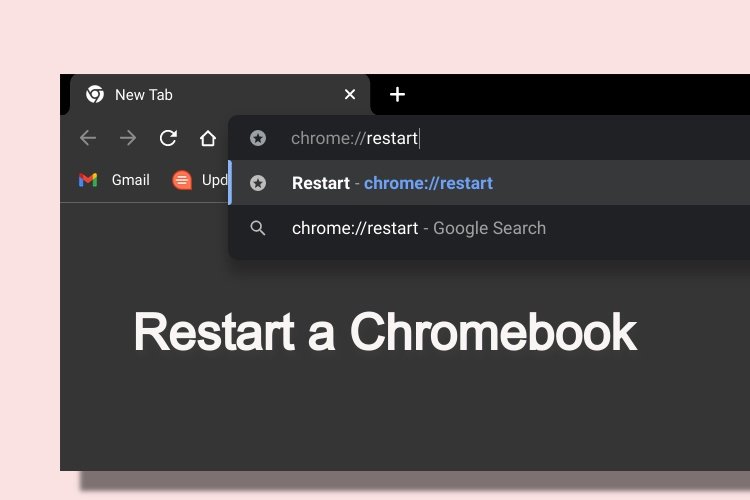
It’s an elegant, quick solution that requires no technical wizardry, yet it resolves a surprisingly large percentage of everyday issues. So, before you panic, remember this fundamental troubleshooting step. For a deeper dive into the mechanics, you might find our guide on how to properly restart your Chromebook incredibly useful.
When Your Chromebook Won't Start Up
The "Chromebook won't turn on" scenario is perhaps the most alarming. A blank screen and unresponsive buttons can make you fear the worst, but often, the fix is straightforward.
Initial Checks for a Dead Device
- Power Up Basics: First, ensure your Chromebook is receiving power. Confirm the charger is securely plugged into both the device and a working wall outlet. Try a different outlet if unsure about the current one.
- Inspect the Charging Port: Take a close look at the charging port on your Chromebook. Is there any debris (lint, dust, crumbs) obstructing the connection? Gently clear it if possible, but avoid using anything metallic that could cause damage. Also, check for any visible damage to the port itself or the charging cable.
- The Wait-and-See Approach: If the screen remains black even after checking the power, plug in the charger, and then step away for about 30 minutes. Sometimes, a completely drained battery needs a little time to reach a charge level sufficient to power on. After 30 minutes, try turning it on again.
Performing a Hard Reset
If the basic checks don't work, a "Hard Reset" is the next step. This isn't the same as a Powerwash (which wipes your data); a Hard Reset simply restarts the hardware, clearing temporary data without touching your files.
How to Perform a Hard Reset:
- Press and Hold: Locate the Refresh key (usually an arrow in a circle, typically above the number 3 or 4 key) and the Power button.
- Hold Them Down: Press and hold both the Refresh key and the Power button simultaneously for about 10 seconds.
- Release and Restart: Release both keys. Your Chromebook should then attempt to restart.
If your Chromebook only powers on when plugged into the charger, and immediately shuts off when unplugged, it's a strong indicator that the internal battery may be at the end of its life and needs replacement. This is usually a job for a professional or a warranty claim.
Screen Troubles: Blank, Flickering, or Frozen Displays
A malfunctioning display can be incredibly disruptive. Whether it’s completely blank, flickering annoyingly, or frozen mid-task, here's how to troubleshoot.
The Simple Restart
For any screen anomaly, the first, easiest step is to try a standard shutdown and restart.
- Force Shutdown: If the screen is frozen or unresponsive, press and hold the Power button until the device completely shuts off (usually 5-10 seconds).
- Restart: Wait a few seconds, then press the Power button again to restart.
This simple action often resolves temporary software glitches that might be interfering with the display driver or Chrome OS's ability to render properly.
External Monitor Test
If a restart doesn't help, determining if the issue lies with the screen itself or the internal graphics (motherboard) is crucial.
- Connect to an External Monitor: Use an appropriate cable (HDMI, USB-C, DisplayPort) to connect your Chromebook to an external monitor or TV.
- Observe: If the display appears normally on the external monitor, then the problem is likely with your Chromebook's built-in screen. If the external monitor also shows a blank or garbled display, the issue points to the internal graphics processor or motherboard.
Booting into Recovery Mode
Recovery Mode provides a bare-bones environment, which can help diagnose if the problem is software-related.
- Initiate Recovery: Turn off your Chromebook. Press and hold Esc + Refresh + Power simultaneously.
- Follow On-Screen Steps: Release the buttons when the recovery screen appears. From here, you can attempt to restore Chrome OS if needed. If the screen displays correctly in Recovery Mode, it suggests a software issue rather than a hardware fault with the screen itself.
Input Issues: Keyboard and Trackpad Glitches
When your keyboard or trackpad stops responding, your Chromebook effectively becomes unusable. Luckily, these are often simple software snags.
Restart First, Always
As with many Chromebook issues, a quick restart is the best initial troubleshooting step for unresponsive input devices. This clears any temporary software conflicts that might be preventing your keyboard or trackpad from communicating correctly with Chrome OS.
- Restart: If you can still access the power menu (e.g., via a connected mouse or by pressing the power button), choose to restart. If completely frozen, perform a force shutdown by holding the Power button until it turns off, then restart.
Trackpad Specifics: The Esc Key Trick
If your trackpad is specifically frozen, sometimes repeatedly pressing the Esc key can help unstick it. This is a niche fix but worth a try before a full restart.
External Input Test
To rule out hardware failure:
- Connect External Devices: Plug in a USB mouse or keyboard, or pair a Bluetooth equivalent.
- Test: If the external devices work fine, it strongly suggests a hardware problem with your Chromebook’s built-in keyboard or trackpad. If external devices also fail, the issue might be deeper, possibly with the USB controller or Chrome OS itself.
The Powerwash Option
If input issues persist even after a restart and testing with external devices, a Powerwash (factory reset) might be necessary. This will revert your Chromebook to its out-of-the-box state, eliminating any corrupted software or user profile data that could be causing the problem. Remember to back up important local files first! You can learn more about this crucial step in our comprehensive guide on the Powerwash process.
Connectivity Conundrums: Wi-Fi Woes
A Chromebook is inherently cloud-centric, so losing Wi-Fi connectivity is a major roadblock. Here’s how to get back online.
The Wi-Fi Toggle and Restart Dance
Many network issues stem from temporary glitches in the Wi-Fi adapter's software.
- Toggle Wi-Fi: Click the time at the bottom-right corner of your screen to open the Quick Settings panel. Find the Wi-Fi icon, click it to turn Wi-Fi Off, wait about 10 seconds, then click it again to turn it On. This often resets the adapter.
- Restart Your Chromebook: If toggling doesn't work, a full Chromebook restart is the next step. This ensures all network services and drivers are reinitialized.
- Router Restart: It's also a good idea to restart your home router by unplugging it from power for 30 seconds, then plugging it back in. This clears your router's temporary memory and can resolve network-wide issues.
Forget and Reconnect
If your Chromebook struggles with a specific network:
- Forget the Network: Go to Settings > Network > Wi-Fi. Click on the network you're having trouble with.
- Select "Forget": Confirm your choice.
- Reconnect: Scan for networks again and reconnect to your Wi-Fi, re-entering the password. This clears any corrupted network profiles stored on your Chromebook.
The Powerwash as a Last Resort
If Wi-Fi issues persist across different networks, even after restarts and forgetting networks, a Powerwash might be necessary. This can resolve underlying software corruption affecting network functionality.
Audio Annoyances: No Sound or Distorted Playback
Silence, when you expect sound, or distorted audio, can be surprisingly frustrating. Fixing audio on a Chromebook usually involves checking settings and a quick restart.
Basic Audio Checks
- Volume & Mute: Click the time at the bottom-right corner to open the Quick Settings panel. Ensure the volume slider isn't at zero and that the speaker icon isn't muted.
- Audio Output Settings: Go to Settings > Sound. Check the "Output" section to make sure the correct audio device is selected (e.g., internal speakers, or your headphones if they're plugged in).
- Headphone Trick: If you often use headphones, try plugging them in and then removing them. This can sometimes reset the audio routing if your Chromebook is confused about whether to send sound to speakers or headphones.
A Refreshing Restart
If all settings appear correct, but you still have no sound or distorted audio, a simple Chromebook restart is your best bet. This reloads the audio drivers and clears any software snags affecting sound output.
Bluetooth Blips: Pairing and Connection Headaches
Bluetooth issues can range from minor inconvenience to complete frustration, especially if you rely on wireless peripherals.
Symptoms of Bluetooth Trouble
- Inability to connect to any Bluetooth device.
- Devices pairing successfully but failing to work.
- A missing or greyed-out Bluetooth toggle in your Quick Settings.
Targeted Bluetooth Fixes
- Toggle Bluetooth: Click the time at the bottom-right corner. Find the Bluetooth icon, click it to turn Bluetooth Off. Wait at least 5 seconds, then click it again to turn it On. This often resolves minor software hang-ups.
- Forget and Re-pair Device: If a specific device isn't working, remove its pairing profile. Go to Settings > Bluetooth > Paired Devices. Click the three dots next to the problematic device and select "Remove." Then, attempt to re-pair the device as if it were new.
- Restart Your Chromebook: This is a crucial step for Bluetooth issues, as it reinitializes the Bluetooth module and its drivers.
- Perform a Hard Reset: If a regular restart doesn't help, try a Hard Reset (press and hold Refresh + Power for 10 seconds). This deeper reset can clear more stubborn firmware glitches.
- Check for System Updates: Outdated Chrome OS can sometimes lead to driver incompatibilities. Go to Settings > About Chrome OS > Check for Updates. Install any available updates and restart your Chromebook.
- Try in Guest Mode: Log out of your user profile and try connecting your Bluetooth device in Guest Mode. If Bluetooth works flawlessly in Guest Mode, your user profile might be corrupted, suggesting a Powerwash could be needed.
- Consider a Powerwash: If all else fails, a Powerwash (factory reset) will eliminate any software-level corruption that could be impacting Bluetooth functionality. Remember to back up your local files beforehand. For more on Bluetooth connectivity, see our guide on connecting Bluetooth devices to your Chromebook.
If, after all these steps, Bluetooth still isn't working, it's possible the Bluetooth chip itself has failed. In this case, contact your Chromebook's manufacturer for warranty support, or consider a USB Bluetooth adapter as a workaround.
Performance Puzzles: When Your Chromebook Runs Slow
Even a typically snappy Chromebook can feel sluggish sometimes. This is rarely a hardware problem, and often a simple restart can significantly improve performance.
The Quick Fix: Restart Regularly
The easiest way to prevent a slow Chromebook is to get into the habit of restarting it regularly—ideally weekly, or even daily if you're a heavy user who rarely shuts down. This ensures that memory is cleared and background processes don't accumulate.
Other Speed-Boosting Strategies
- Close Unused Tabs and Apps: Each open tab and active application consumes RAM and CPU cycles. Be ruthless in closing anything you're not actively using.
- Disable Unnecessary Extensions: Browser extensions can be incredibly useful, but they also run in the background and can be resource hogs. Type
chrome://extensionsinto your browser bar, review your installed extensions, and disable or remove any you don't frequently use. - Clear Browser Cache: Over time, your browser cache and cookies can build up, sometimes leading to slower page loads or general sluggishness. Type
chrome://settings/clearBrowserDatainto your browser bar. Select "Basic" (or "Advanced" for more options), choose a time range (e.g., "All time"), and click "Clear data." - The Powerwash Protocol: If your Chromebook's speed doesn't improve after regular restarts and these optimization steps, a Powerwash is the ultimate performance reset. It clears everything, giving you a fresh, fast system again. For more in-depth advice on keeping your device zippy, explore our tips for optimizing your Chromebook's performance.
Beyond the Restart: Advanced Troubleshooting Steps
While a restart is often the magic bullet, some issues require a more significant intervention.
The Powerwash Protocol: Factory Resetting Your Chromebook
A Powerwash is Chrome OS's equivalent of a factory reset. It erases all local data and user accounts on your Chromebook, returning it to its "out-of-the-box" state. This is a powerful troubleshooting step for persistent software problems, but it will delete anything saved in your local Downloads folder, so back up your files first!
How to Perform a Powerwash:
- Open Settings: Click the time at the bottom-right corner of your screen, then click the Settings gear icon.
- Navigate to Reset: In the left-hand menu, scroll down and click on Reset Settings (or Advanced > Reset Settings).
- Select Powerwash: Under the "Reset" section, you'll see "Powerwash." Click the Powerwash button.
- Follow On-Screen Instructions: Your Chromebook will guide you through the process, which involves signing out, confirming the reset, and then restarting.
- Sign In and Restore: After the Powerwash, you'll sign in again as if it were a new device. Most of your settings and apps will sync back from your Google account.
If the problem persists even after a Powerwash, it strongly indicates a hardware issue that will require professional repair or warranty support.
Mastering Caps Lock on Your Chromebook
Chromebooks famously lack a dedicated Caps Lock key, which can confuse new users. Understanding how it works and troubleshooting any issues is straightforward.
Caps Lock Functionality:
- Toggle On/Off: To activate or deactivate Caps Lock, simply press Alt + Search (or Alt + Launcher on newer models, which is the key with a circle icon, usually where Caps Lock would be).
- Visual Confirmation: A small pop-up notification will appear on your screen when Caps Lock is active, and another when it's turned off.
- Quick Off: You can also turn off Caps Lock by simply tapping the Shift key once.
Customizing the Search Key:
You can remap the Search key to function as a dedicated Caps Lock key if you prefer.
- Open Settings: Click the time > Settings.
- Go to Keyboard Settings: Navigate to Device > Keyboard.
- Remap Search Key: Click the drop-down menu next to "Search."
- Select "Caps Lock": Choose "Caps Lock" from the options, then click "OK." Your Search key will now toggle Caps Lock directly.
Troubleshooting Caps Lock Issues:
If Caps Lock isn't behaving as expected:
- Restart Your Chromebook: This is the quickest fix for any software glitch affecting key functions.
- Check for System Updates: Ensure your Chrome OS is up to date, as updates often include keyboard driver improvements.
- Perform a Hard Reset: If a regular restart doesn't work, a Hard Reset can sometimes resolve more stubborn keyboard issues.
- Test in a New User Account or Guest Mode: If Caps Lock works correctly in a different user profile or Guest Mode, your primary user profile might have corrupted settings. A Powerwash might be necessary.
- Hardware Check: If the issue persists across all these steps, and other keys also show problems, it could indicate a hardware issue with the keyboard itself.
Customizing Your Chromebook Keyboard and Accessibility
Chrome OS offers robust options to tailor your keyboard experience and enhance accessibility.
- Keyboard Options: In Settings > Device > Keyboard, you can remap the Search key (also known as the Everything Button or Launcher key) to various functions: Caps Lock, Ctrl, Escape, Backspace, or Google Assistant. You can also adjust the auto-repeat delay and rate.
- Accessibility Features: Under Settings > Advanced > Accessibility > Manage accessibility features, you’ll find powerful tools:
- Sticky Keys: Allows modifier keys (Shift, Ctrl, Alt) to be pressed one at a time, which is helpful for users who find holding multiple keys challenging.
- On-screen Keyboard: A virtual keyboard for touchscreens or mouse input.
- Keyboard Repeat Rate Adjustment: Fine-tune how quickly a key repeats when held down.
- Dwell Typing: Enables typing without physically pressing keys by hovering over them.
External Keyboards: Bridging the Gap
Chromebooks are highly compatible with external keyboards, both USB and Bluetooth.
- Automatic Recognition: Chrome OS generally recognizes most external keyboards automatically.
- Key Mapping Differences: While most keys function as expected, be aware of some common differences:
- The Windows key or Command key on an external keyboard typically functions as the Search/Launcher button on a Chromebook.
- Alt + Search is still used for Caps Lock (unless you’ve remapped the Search key).
- Alt + Backspace acts as the Delete key.
- Alt + Up/Down arrows function as Page Up/Page Down.
- Function Key (F1-F10) Actions: Standard function keys on an external keyboard map to specific Chromebook actions:
- F1: Back (browser)
- F2: Forward (browser)
F3: Refresh - F4: Full-screen mode
- F5: Switch window
- F6: Decrease brightness
- F7: Increase brightness
- F8: Mute
- F9: Volume down
- F10: Volume up
- Customization: You can further customize external keyboard functions and add multiple input methods for different languages via Settings > Device > Keyboard.
When to Seek Professional Help
While most common Chromebook issues can be resolved with the steps outlined here, there are times when the problem points to a hardware failure. If you've:
- Performed all restarts (regular, hard reset).
- Completed a Powerwash.
- Tested with external peripherals (if applicable).
- Checked for system updates.
And the issue still persists, it's likely a physical component of your Chromebook has failed. At this point, it's best to contact your Chromebook's manufacturer for warranty support or seek assistance from a certified repair technician. Resources like ifixit.com also offer detailed repair guides for specific Chromebook models if you're comfortable with DIY hardware fixes.
Final Thoughts: Empowering Your Troubleshooting Journey
Troubleshooting can feel intimidating, but with Chromebooks, the process is often surprisingly simple, starting with the power of a basic restart. By understanding why a reboot is effective and following these systematic steps, you can confidently address the vast majority of common issues you might encounter. From unresponsive screens to connectivity woes, your Chromebook is designed for resilience, and you now have the tools to help it bounce back. Stay calm, try a restart, and remember that you’re well-equipped to keep your Chromebook running smoothly.